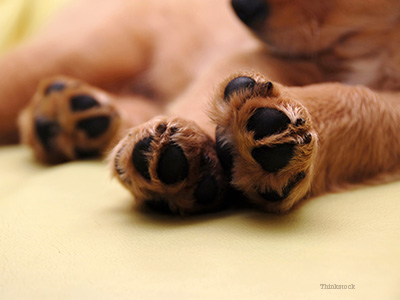
This is a great question. Amidst all of the fun and excitement of getting to know your new puppy and enjoying his exuberance and innate puppy “joie de vivre” people often overlook some of the minor, maintenance issues that come along with that cute, little bundle of energy—that is until an unkempt, dagger-like toenail suddenly scratches them into awareness. So how do you get your adorable little, whirling dervish to sit still long enough to have his nails trimmed? More importantly, how do you trim them without causing either of you undue stress or pain?
Acclimate before cutting puppy nails
Ideally, you should be getting your puppy accustomed to certain kinds of handling before there is even a need for it. Every day you should be looking in his ears, checking his teeth, opening his mouth like you are giving him imaginary pills and handling his feet and nails. Basically, you should hold each paw and then each individual toe/toenail—giving your puppy positive reinforcement (either verbally or with tiny bits of treats) for being tolerant of the manipulations without actually trying to cut his nails.
Observe carefully when cutting puppy nails
While you are getting your puppy used to having his feet and nails handled, look at the anatomy of his toenails. Dog’s nails tend to grow out straight/horizontally at first and then naturally curve down toward the ground and taper to a point. If your puppy has any white nails, you will be able to see the pink area or “quick” at the base/beginning of the nail where the blood supply is. You will want to cut beyond that point to avoid discomfort or bleeding. If you can’t see the pink area, then use the natural curve and narrowing of the nail as your guide and cut just beyond that curve.
Have your tools ready when cutting puppy nails
There are generally two types of dog nail clippers:
- The guillotine type—with a circle at the end that encloses the nail and a blade the moves into the circle to cut the nail tip.
- A scissor type that cuts from two sides coming together
It is personal preference which you prefer to use. However, both types of clippers can seem awfully big and can make it difficult to actually see the nail when cutting a young puppy’s little nails. In the beginning, while your puppy’s nails are still small, you may find that using your own compound-lever-type nail trimmer may be much easier for you since you are accustomed to using it in the first place, and because it will allow you to more clearly see exactly where you are going to cut the nail.
You will also want to have some type of styptic powder, quick stop or clotting agent available in case you do cut a nail too short and cause bleeding. [Editor’s Note: Ask your veterinarian for a recommendation.]
Start small when cutting puppy nails
At this point, you and your puppy are already used to feet and toe handling and so try cutting a couple of nails. You don’t have to cut all of them in one sitting. Play with a few. And then cut a couple while giving the same verbal/food rewards and encouragement as before. Trim as many as you both feel comfortable with, but don’t push it. Take a break if you need to and come back to it later. You’ll have a lifetime of this process ahead of you, take your time.
Don’t panic if your puppy cries
Little kids cry when they get a haircut. That doesn’t mean their hair hurts. So if your puppy whines when you are cutting his nails, it doesn’t necessarily mean you’ve hurt him. It may just be that he’s anxious about the process and the strange pressure on his nails. With that being said, can you hurt him if you cut the nail too short? Sure. Will he bleed? Yes. Will he survive? Absolutely. [Editor’s Note: If you do have any concerns about cutting too much or a bleed that won't stop, contact your veterinarian right away.]
Tips for cutting puppy nails
- Don’t forget that he may have ‘thumbs’ or dewclaws on any or all of his feet. Not all dogs do and they can be hard to find in hairy breeds, but if yours does it is especially important that you trim those since they never touch the ground to wear naturally.
- The nails on the back feet often are shorter than on the front, and outer nails can wear differently than the inner ones, so try not to just get into a rhythm of cutting the exact same amount off of every nail. You may have to take more or less on any individual toenail.
- You can always come back again. When in doubt, just cut the tiny tip of the nail. If the cut surface still looks dry and brittle and ‘dead’ you can try taking a bit more. If it looks softer in the center, better to leave it be until next time.
- You can file any rough areas of the cut surface of the nail smoother with an emery board but you’ll want to gradually get your puppy accustomed to how that feels too just like you do with the cutting itself. (Some people use only electrical grinders to shorten their dog’s nails, but that’s a different skill set and requires getting your dog used to the sound of the grinder, too.)
Most importantly, don’t rush. Take your time and let both your puppy and you get used to the process.
If you have any questions or concerns, you should always visit or call your veterinarian -- they are your best resource to ensure the health and well-being of your pets.
